Why should you replace your brake pads?
The most common reason to replace your brake pads is if they are worn and braking performance is deminished, but you may also need to swap them over if you rotate between carbon and alloy wheelsets.
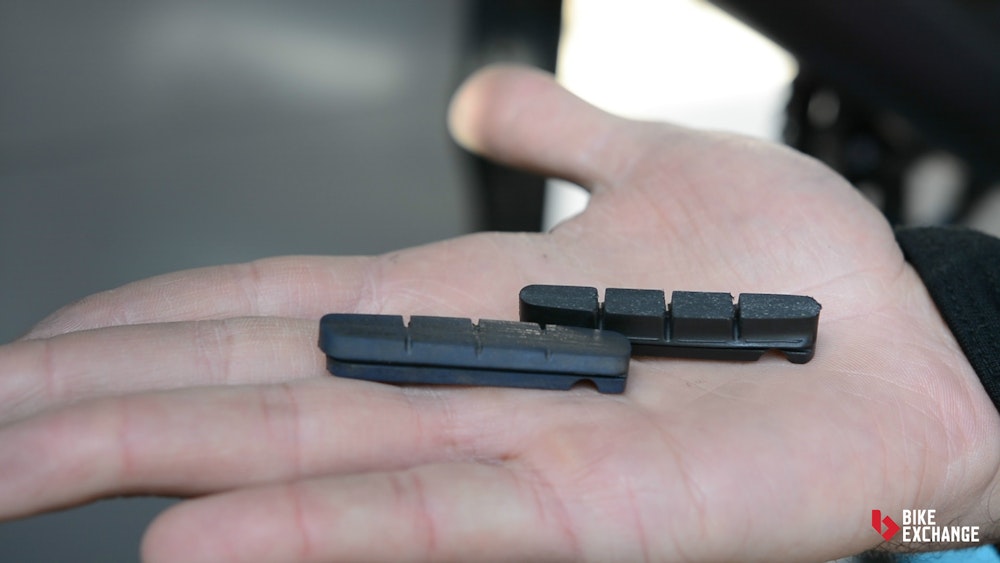
You'll know it's time to change your brake pads if it takes a long time to slow down, braking becomes unresponsive and there is a screeching sound when the brakes are applied forcefully. As well as these signs, the grooves in brake pads are wear indicators and will show you when they need to be replaced. Riding in adverse weather conditions will wear your brake pads quicker, as will riding in groups where you tend to brake more as a result of being reactive to the person in front.
Not replacing brake pads when they are due could lead to damage to your rims or worst, yourself.
If you are swapping between wheelsets which have alloy and carbon braking surfaces, different pads are required and will need to be changed each time.
Procedure for removing brake pads
To make the job easier start by removing the wheels. For the rear wheel place the chain into the smallest chain ring on the front and smallest sprocket on the back, this will create slack in the chain to ease the process.
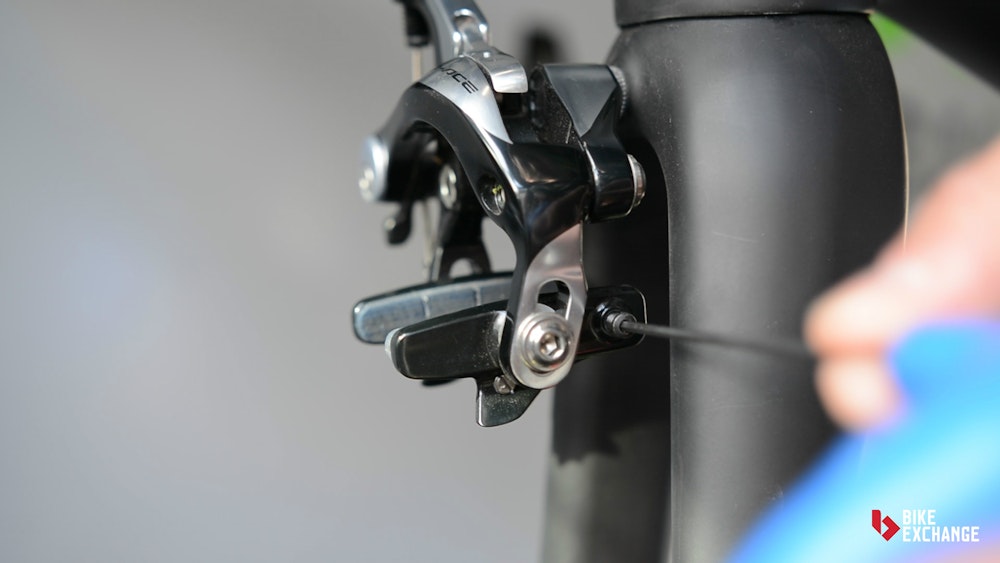
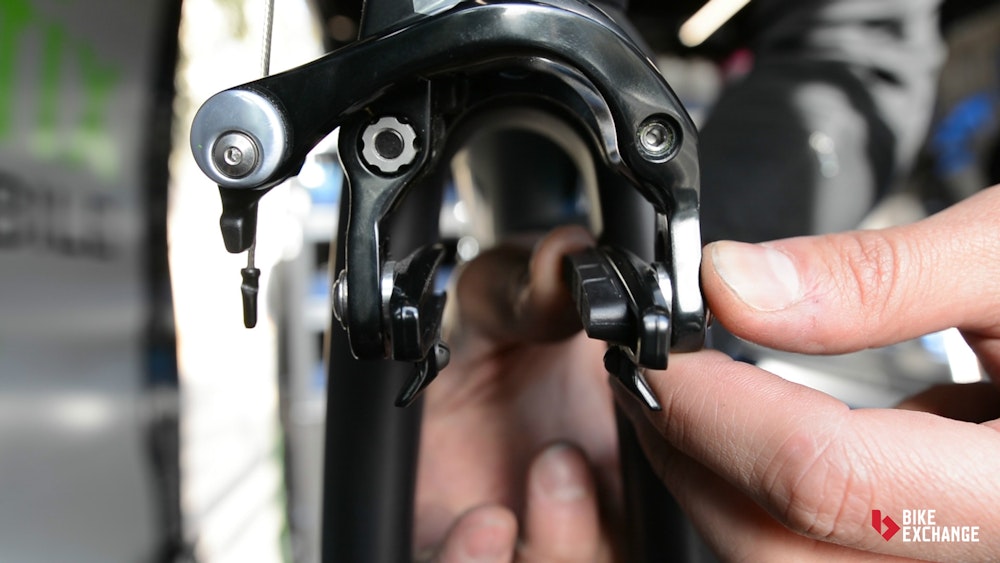
Then undo the 'grub' screw. This is the small screw found on the outside of the brake shoe that hold the brake pad in place. The screw doesn't need to come all the way out, just far enough to remove the brake pad.
Slide the pad out towards the back of the bike. The ease of this process will vary depending on how long the pads have been in place and the type of weather you've been ridden in. It's not uncommon for brake pads to become stuck as grit, dirt and fine particles embed themselves into the pad and brakes. You may need to use some force in the form of pliers or a screw driver to push the brake pads out.
Important tip: Always remove brake pads to the back of the bike, don't try to force them through the front. The front of the pad holder is blocked off to prevent the pads coming out during use. They should only be removed and installed from the rear.
Procedure for inserting brake pads
When you are ready to install your new pads, make sure the directional arrow on the brake pad is facing the correct way and you have the correct side. Brake pads will normally be labelled 'left' or 'right' (or L / R) and it's essential to proper brake function that the side is correct.
Push the pad into place.
- More often than not, new brake pads will come with new grub screws. If this is the case, use the new screws. It's easy for the screw head to become rounded and difficult to remove.
Tighten the grub screw, give your wheel a spin and your brake lever a squeeze to ensure everything is in working order. Chances are you will need to make some minor adjustments to the brake.
Adjusting the brake caliper for new pads
New brake pads will have more tread than your worn pads, as a result the distance between your wheel and the pad will change when they are replaced. There may not be enough room between the wheel and pads (which will be the case if you have adjusted the cable tension along the way) so you will need to adjust your brakes to provide a little more space. Small changes can be made via the barrel adjuster on the relevant cable, larger changes will require the cable tension to be adjusted.
Adjusting the cable tension on your brake is a quick and simply process. A brief summary is below;
Make sure the wheel is sitting correctly in the drop outs and aligned as it should be.
Inflate your tyres to the pressure you intend to ride on. Rims can expand slightly when tyres are inflated so it's important adjustments to the brakes are made with this in mind.
Set the barrel adjuster. If the barrel adjuster is set too far one way, there will be no room for micro-adjustments as the cables loosen or you swap wheels with different rim widths. Make sure you have room to adjust the barrel both ways by two full turns.
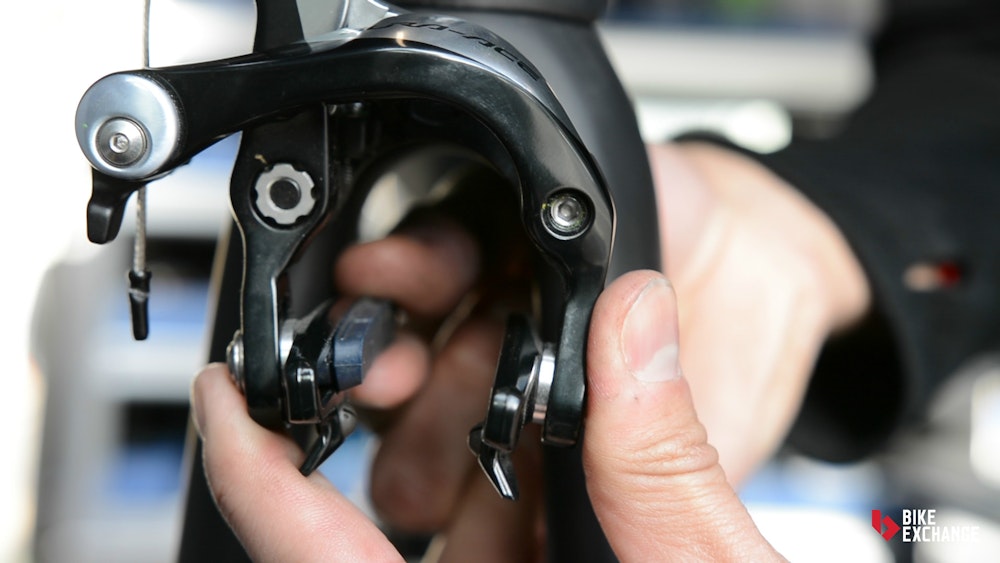
Ensure the pads contact the rim evenly and squarely. To do this you will need to loosen the screw that holds the brake block in place, normally with a 4 or 5mm hex key. Make sure they line up with the brake track of the wheelset evenly and squarely. Look out for imbalances where the brake pads contacts the brake track from the front or back. And make sure the pad is sitting in the middle of the brake track and not touching the wheel surface or the tyre. Once you have the brake pad in the right position it's time to tighten the brake block.
The amount of movement in the brake lever before the pads engage with the rim is a matter for personal preference, but this should be adjusted next. To do this unscrew the cable clamp and let the brake arms relax. Then move the brake arms (complete with the new brake pad) into the position you want, a 2mm gap is common, and pull any cable slack. At this point re-tighten the cable clamp.
If you still need to make adjustments after this point they should only be small, so use the barrel adjuster.
Test your brakes to make sure they feel right and are set-up correctly. Pull firmly on the brake levers and ensure everything is tight and staying as adjusted. If not, repeat the above process until you have them set perfectly.
Tips on changing your brake pads
Be aware of the braking surface of your wheels and ensure the brake pads match. There are specifically designed carbon brake pads for carbon braking surfaces, and standard brake pads for alloy braking surfaces. Using the incorrect brake pad will result in reduced braking performance and could result in rim damage. A standard brake pad on a carbon braking surface will also make a terrible high-pitched noise, that's a giveaway you've got the wrong pads on.
Make sure you clean the brake track before re-inserting the wheel. The brake track will accumulate dirt, grit and fine substances that could negatively affect braking performance. While the wheels are off the bike give them a good once over. On older wheels look for wear to the rim braking surface, it should be flat in shape and not concave. A sunken shape is the sign of a worn out rim that could potentially explode under the pressure of the tyre.
Some brands create specific pads for specific wheel sets or brakes (Campagnolo for example), so make sure you have the correct spares.
Check out other BikeExchange Workshops 'How-to's' here;
Thanks BikeFix Mobile for the helpful advice and expert mechanic.